
INSTALL NATIVE INSTRUMENTS
KOMPLETE 12
Installing and activating Native Instruments KOMPLETE 12 is pretty easy.
The process is almost entirely automated thanks to Native Access.
But, before you install, you will need to decide WHERE you want everything installed.
You can set the location for sample libraries, and VST files for example.
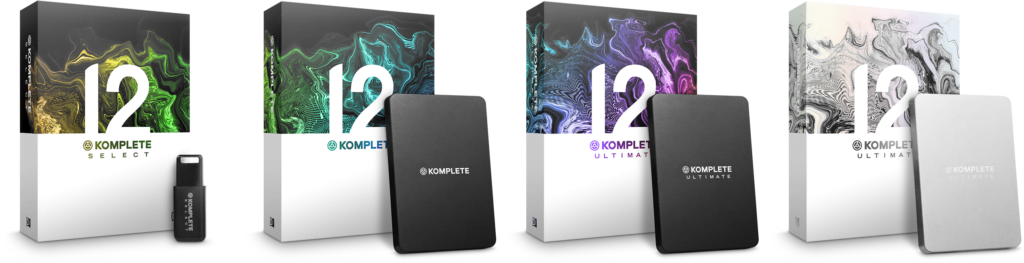
We will be installing KOMPLETE 12 ULTIMATE COLLECTOR’S EDITION, but the process is the same for all versions.
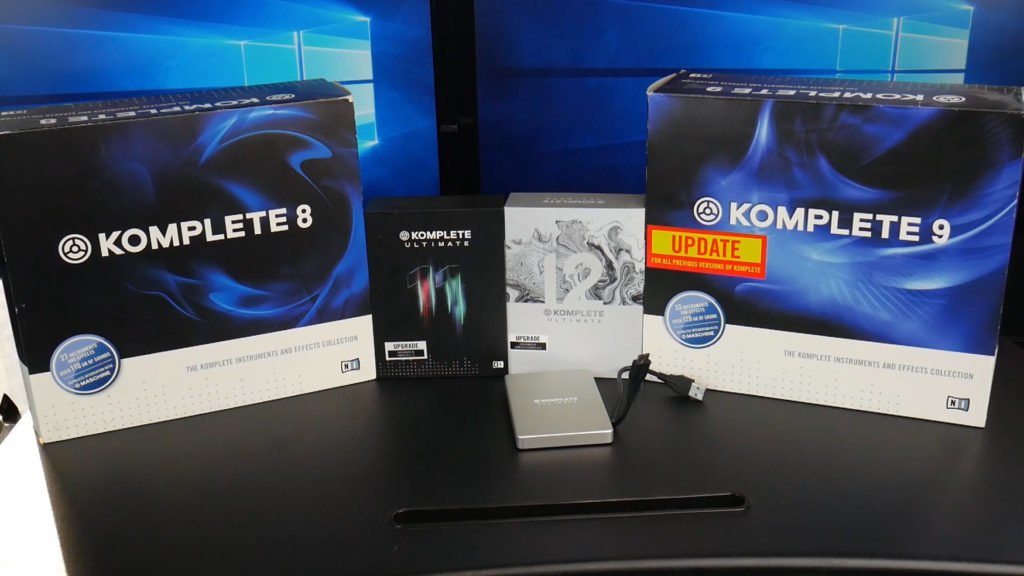
UNBOXING KOMPLETE 12
STEP ONE
First, you need to install Native Access. You can connect the included hard drive and install Native Access from there, or you can download the latest version here.
If you haven’t done so yet, connect the hard drive to your computer before opening Native Access.
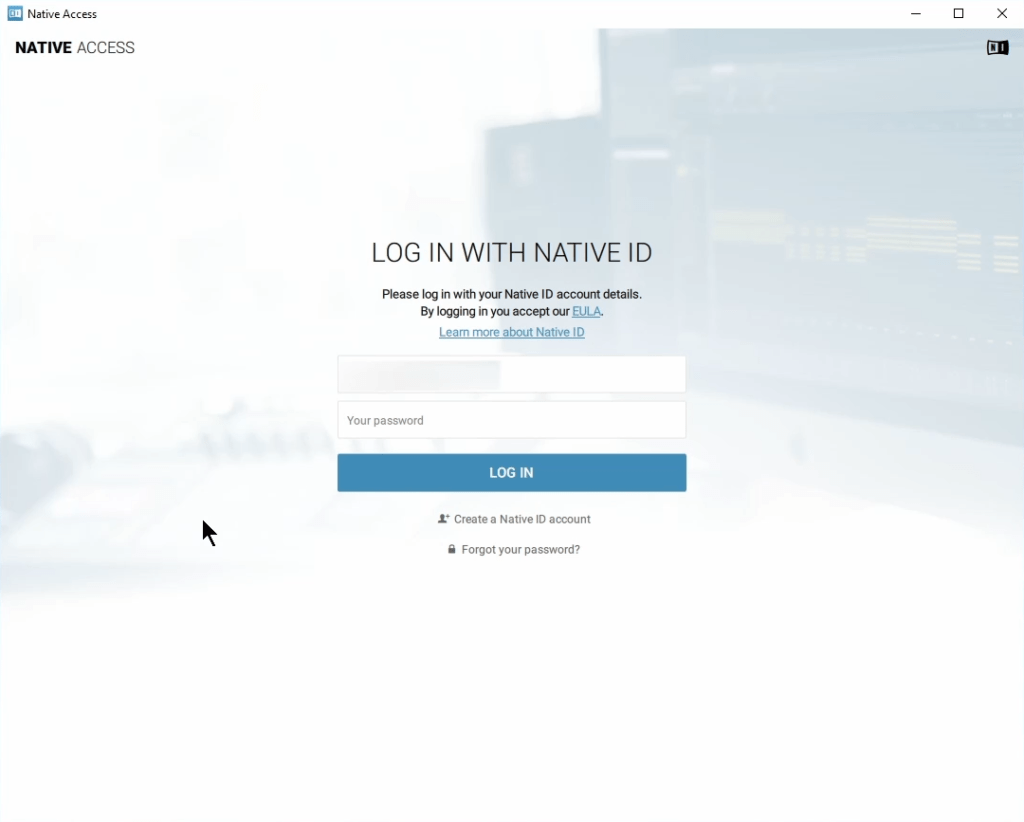
Open Native Access and log in.
If you don’t have a Native Instruments account, you will need to create one.
STEP 2
After logging in, you should be presented with a screen asking you to enter your serial number.
If you are not, just click, “Add a serial”
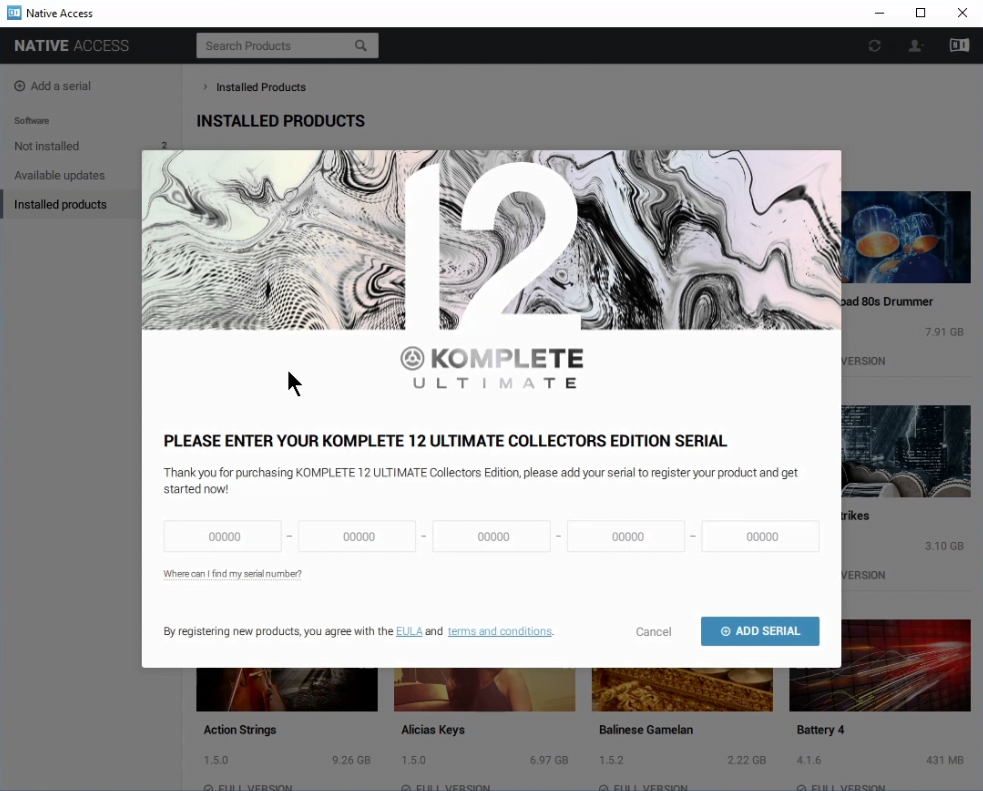
Enter your serial number and click ‘ADD SERIAL’
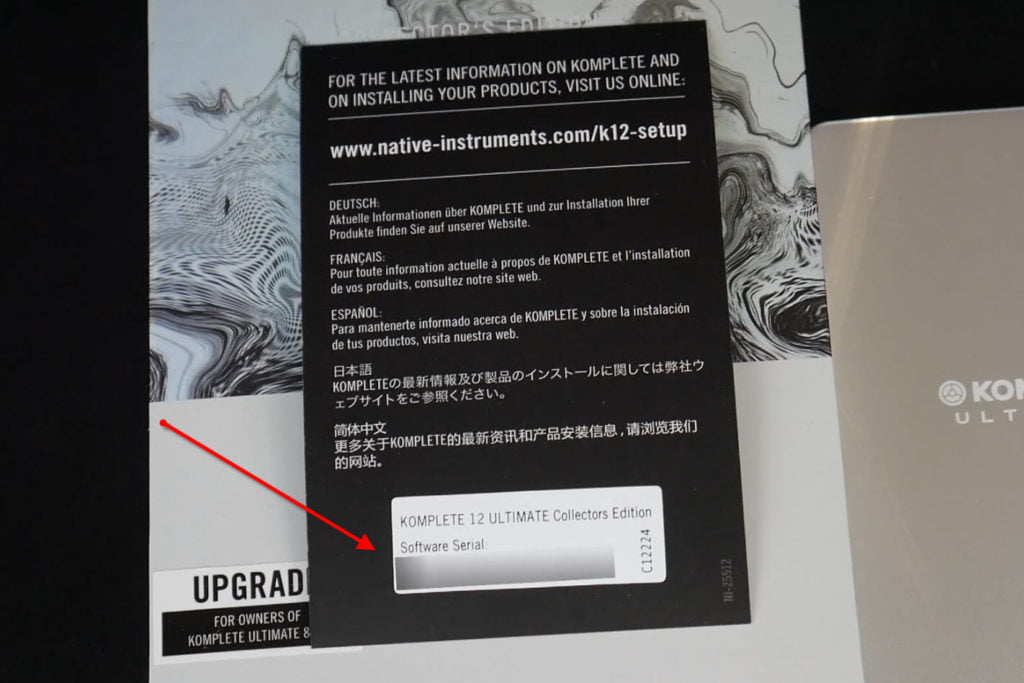
You will find your serial number on the black card included in the box.
Click ‘View Products Not Installed’ and move to step 3.
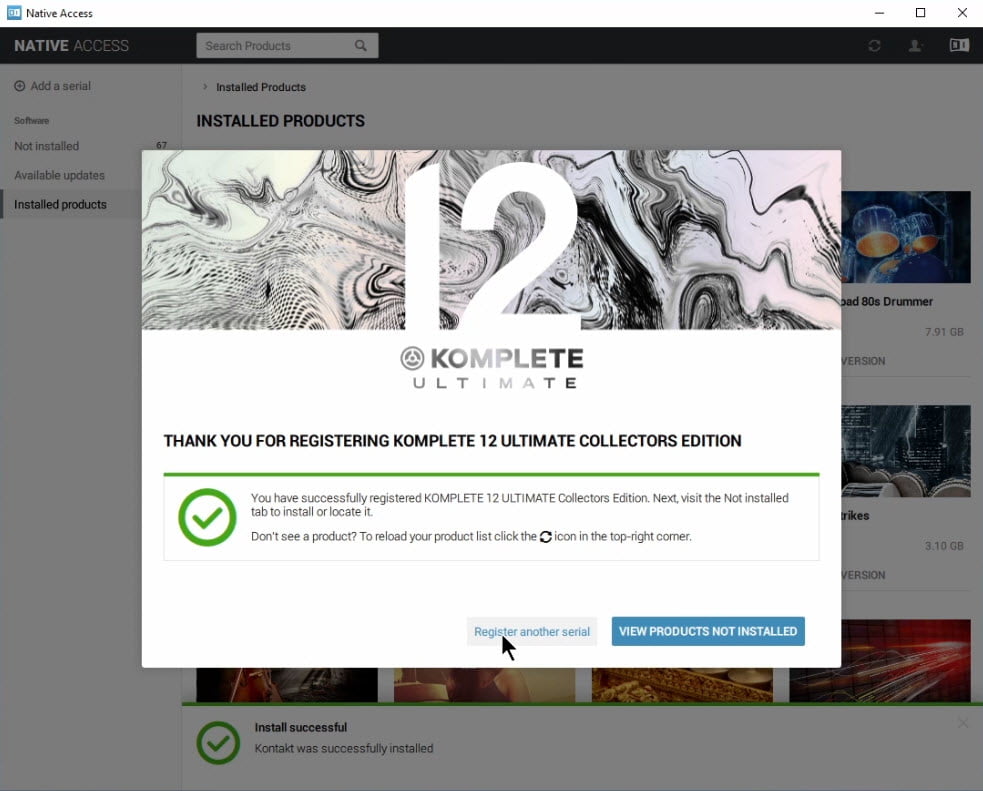
STEP 3
KOMPLETE 12 is now registered to your account, and the plugins are activated.
Now, you need to install the plugins and sample libraries.
But, before you do that, make sure to check ‘Preferences’ and setup your content locations.
Click the person icon in Native Access, and choose Preferences.
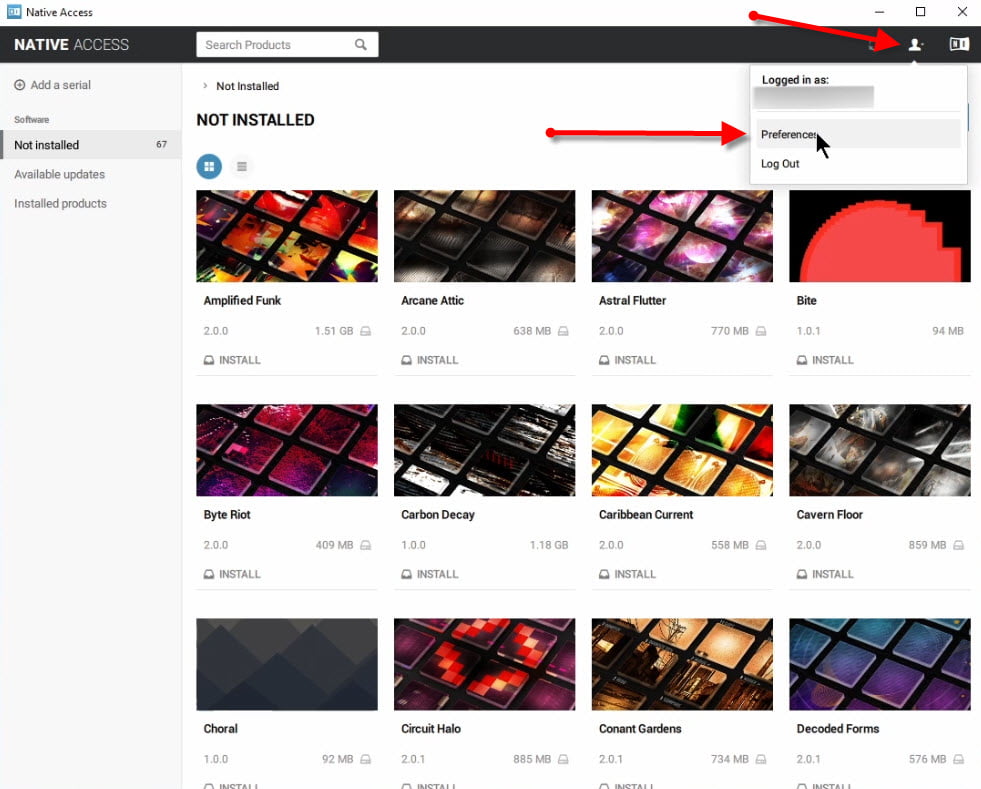
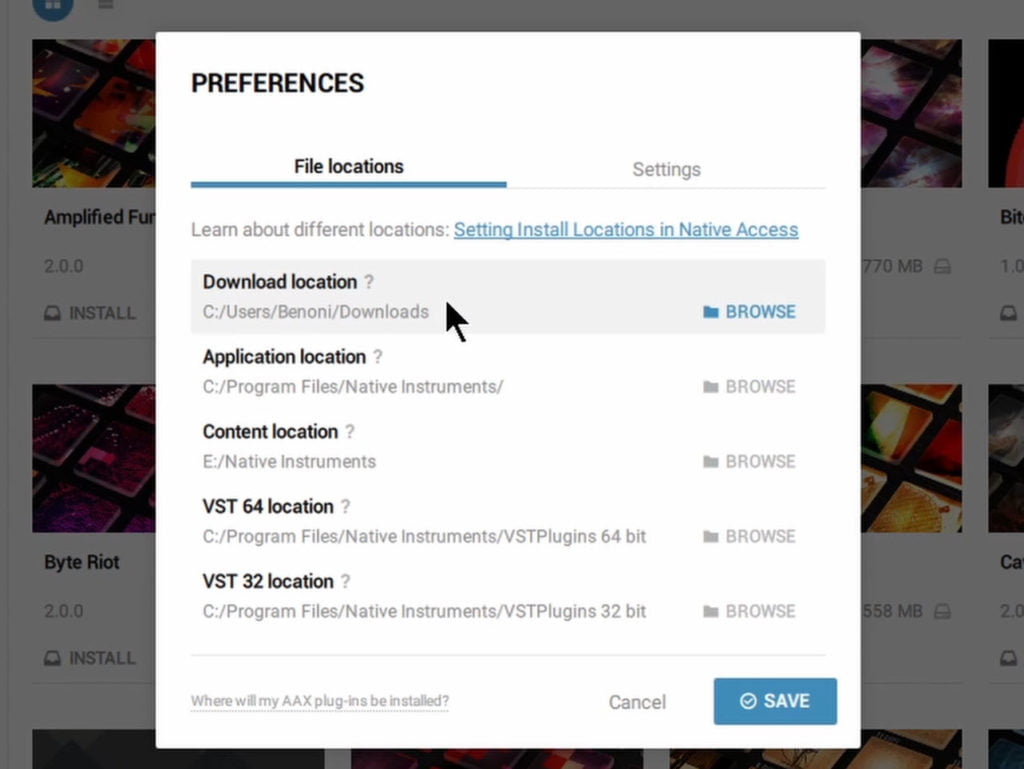
In Preferences you have the option to select the Download Location, Application Location, Content Location, and VST Location.
DOWNLOAD LOCATION
If you have the boxed version, most of the content will be on the hard drive, but there will probably be updates that need to be downloaded.
If you have the download version, you will have to download everything.
In most cases the default Download location will be fine unless your OS hard drive is low on space. You can always switch it to a different location if needed.
APPLICATION LOCATION
The Application Location is where the plugins will be installed.
The applications are the actual programs, NOT the content or sample libraries.
You will want to leave this set to the default in most cases. The Applications themselves are not very large and it’s best to install them on your OS drive.
CONTENT LOCATION
The Content Location is your sample libraries, things like Action Strikes, Abbey Road Drummer, etc…
These can be installed anywhere.
In general, it’s a good idea to install the content to a secondary hard drive.
There are many reasons for this.
One is that sample libraries are very large. They can be 5GB, 10GB, 30GB+ each! If you ever had to re-install your OS you would be overwriting your libraries.
You also have to consider the load on a single hard drive. Each drive only has a certain amount of bandwidth. If you are running your apps and samples on a single drive, and recording, you may have reduced performance.
The secondary hard drive can be internal or external. My preference is another internal drive (SSD preferred). But, you could also use an external drive.
If you are using an External Drive, make sure it’s at least USB3, with Thunderbolt or E-SATA being preferred.
VST LOCATION
The VST location is for the VST2 files.
Since VST2 plugins can be installed anywhere, you may have a preferred location that you like to use.
The default location is in the Native Instruments folder on your OS drive. It’s fine to leave it to this location, just be aware that you will need to add that path in your VST capable DAW, otherwise you won’t see your Native Instruments plugins in your DAW (Reaper, Cubase, Studio One, etc…)
What about AAX plugins for Pro Tools?
You won’t need to do anything for your AAX plugins if you are a Pro Tools user. AAX plugins can only be installed to one location and Native Access will put them where they need to be.
What about the included hard drive?
You might be asking why you need to choose a content location if you have the included hard drive.
Well, the included hard drive is ONLY for the installation. You CANNOT use it to run your programs or sample libraries.
Years ago Native Instruments would include several DVDs for the installation of KOMPLETE.
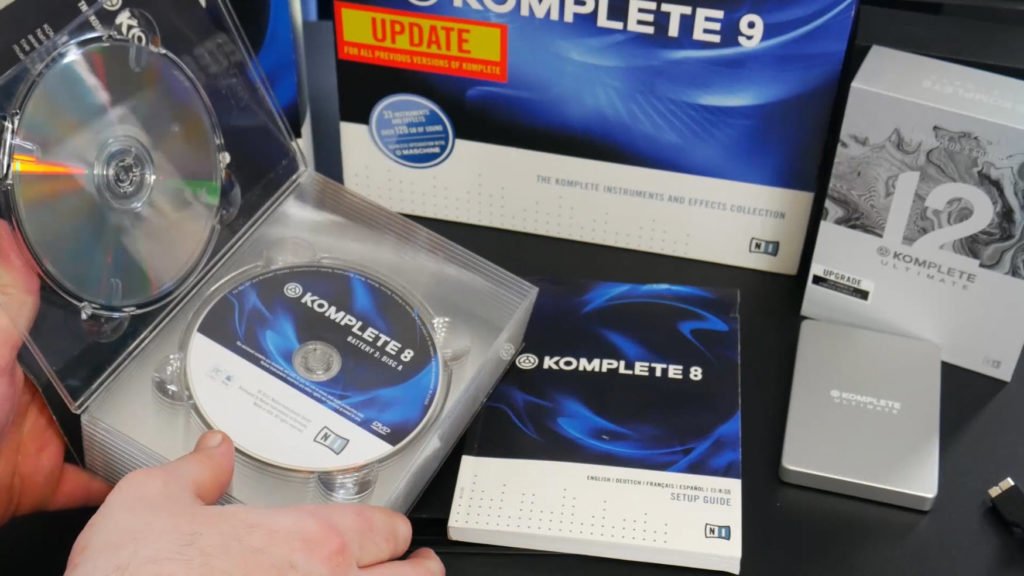
And the installation process took a very long time! Having to switch DVDs over and over and over was a huge pain!
So these days Native Instruments instead includes a hard drive will all of the installers (ISO files).
Native Access will automatically load the ISO files one-after-another, which makes the installation much easier since you don’t have to sit around and wait to swap DVDs.
You can think of ISO files as virtual DVDs. In fact, if you watch the installation process from ‘My Computer‘ you will see each ISO file being loaded as a virtual DVD.
So should you purchase the download version instead?
Well, that’s up to you.
The content is exactly the same as the boxed version, but you will have to download all of the content.
Keep in mind that KOMPLETE 12 ULTIMATE COLLECTOR’S EDITION is about 630GBs to download!
If you have fast internet and a place to store the installers, then the download version is fine.
However, I prefer to have the hard drive.
That way I’ll always have the installers when I need them and I don’t have to spend days downloading content.
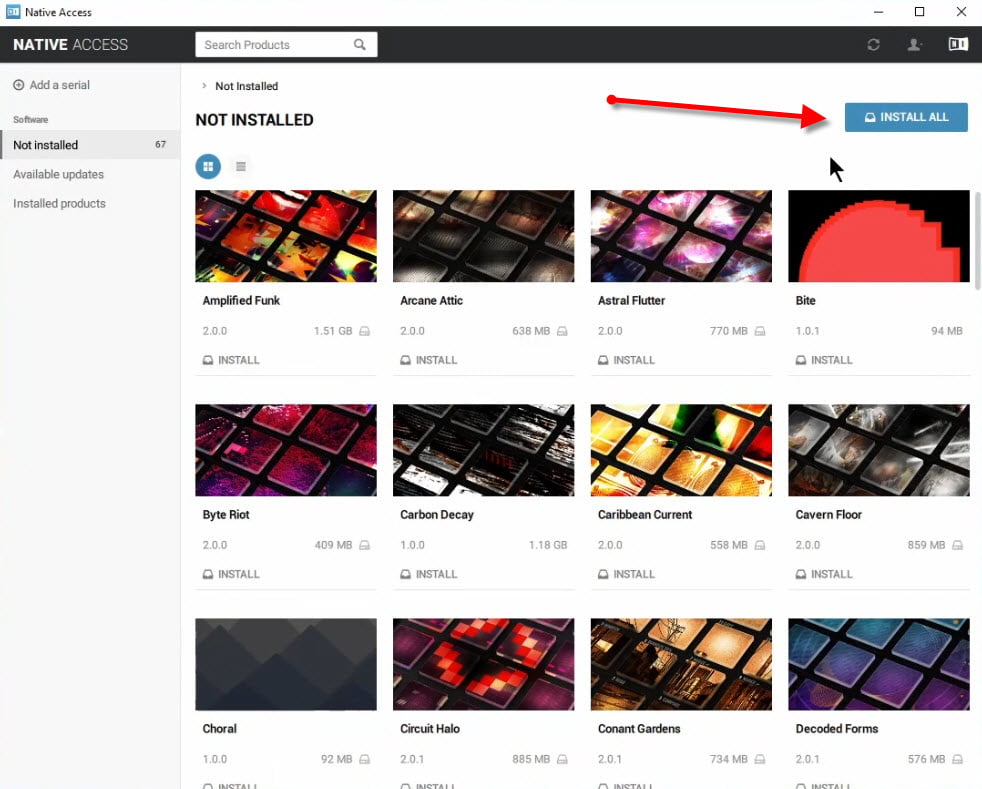
STEP 4
Now that your content locations are setup, all you need to do is click ‘Install All‘
If you don’t want to install all of the content, no problem!
Instead of clicking “Install All” just select the items you want to install. However, I would image most people will want all of the content they paid for.
So now all you need to do is wait.
You can walk away for a couple hours and when you come back, Native Access will have completed the installation for you. It’s a very smooth process.

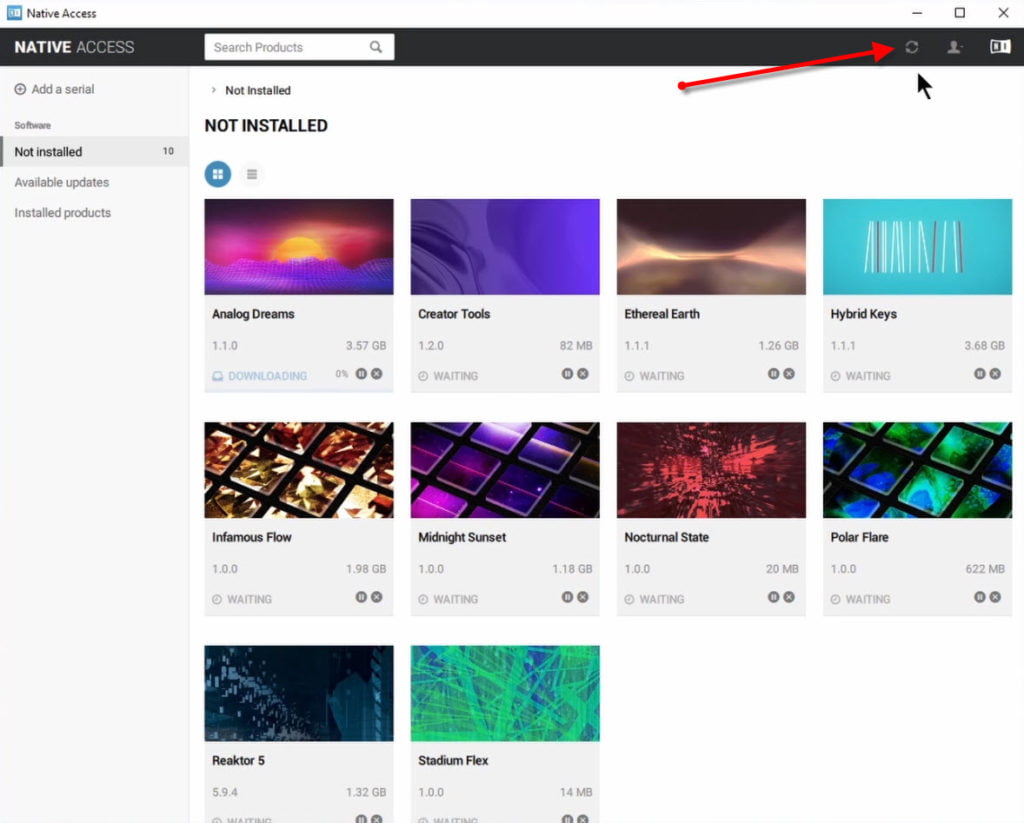
Once everything is installed you are almost done.
Be sure to click REFRESH!
You will probably have some extra download-only content to install.
Click ‘Install All‘ again, and wait a few more minutes.
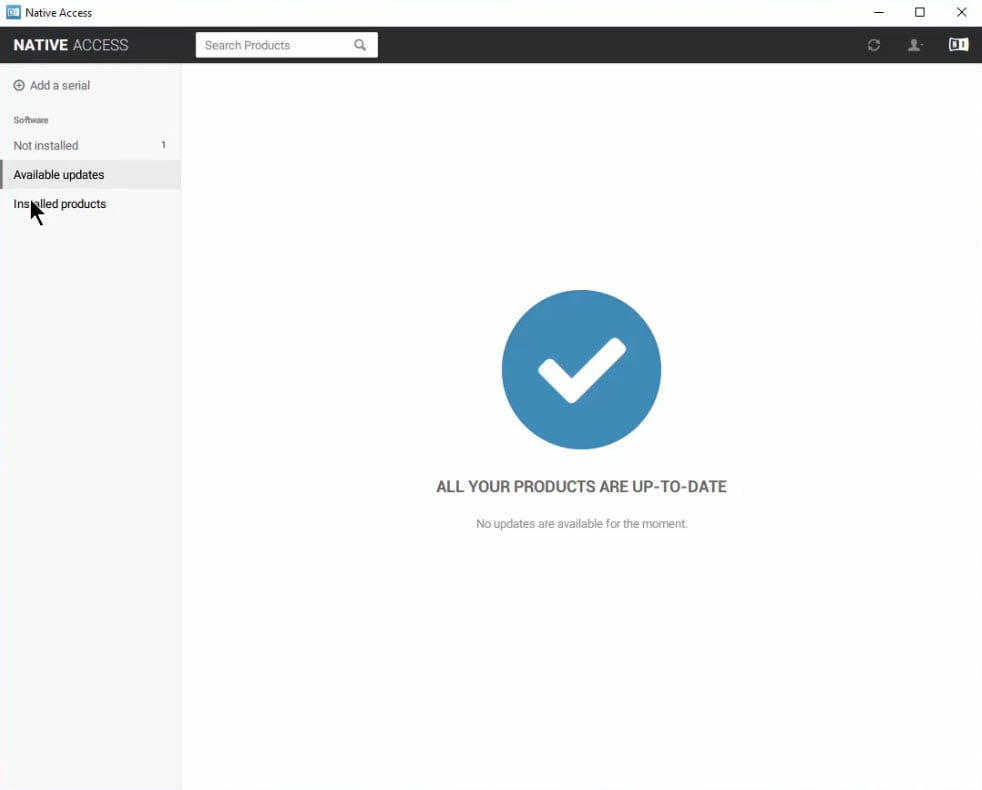
And that’s it!
You have installed KOMPLETE 12 and your plugins are activated and ready to use.
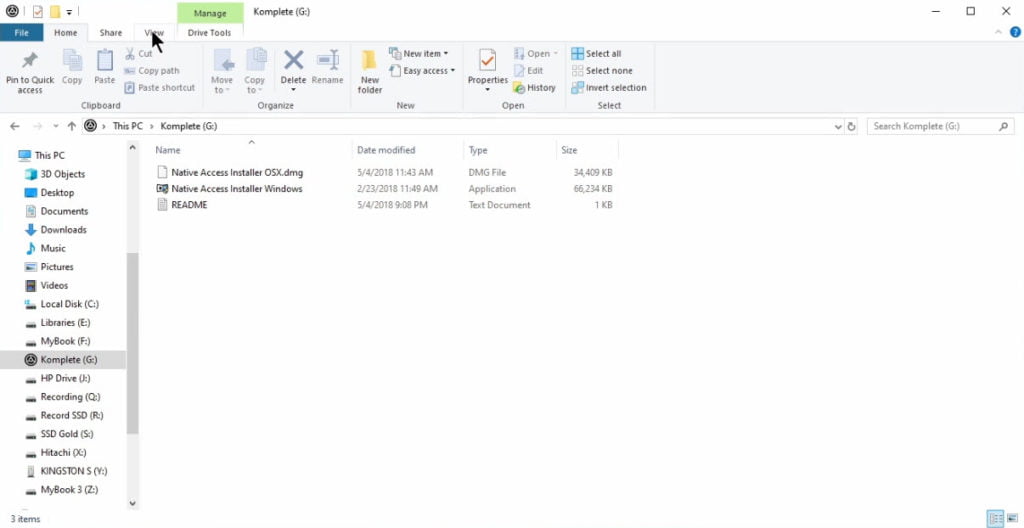
Why does my hard drive look empty?
When you open the included hard drive it may appear as if there are only 3 items; two installers for Native Access, and a README.
But don’t worry, all of the installation files are there, they are simply hidden!
Most people would be confused by seeing all of the ISO files, so Native Instruments made them hidden by default.
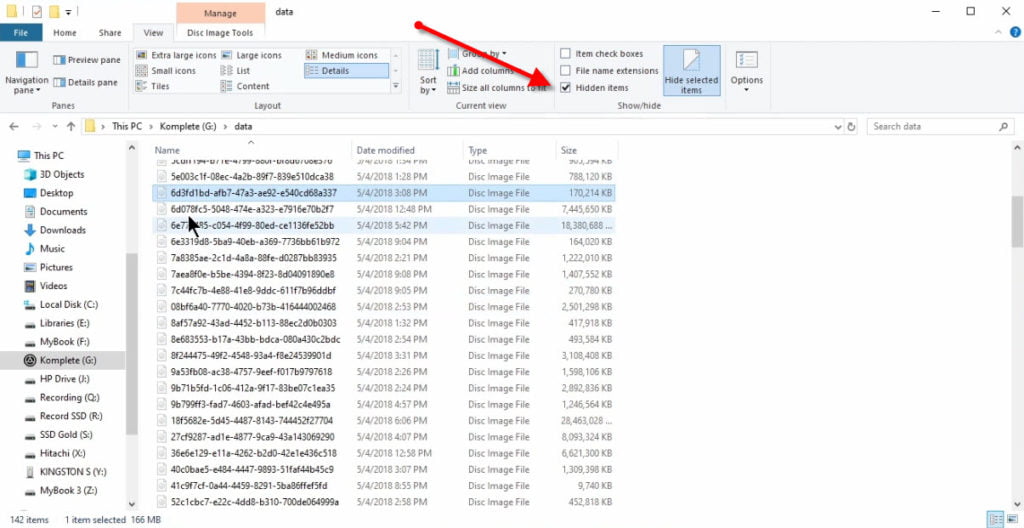
If you want to see the included ISO files you need to show the hidden files.
Once you do that you will be able to see everything that is actually on the hard drive.
You could even install the ISOs manually this way as well, though I don’t know why you would want to since Native Access is mush easier.
Watch the video to see all of this in action.
Compare what’s included in each version of KOMPLETE 12
Native Instruments KOMPLETE is the premier bundle of virtual instruments and has been for many years.
If includes industry standards like, KONTAKT 6, REAKTOR 6, MASSIVE, ABSYNTH, FM8, and tons of sample libraries (depending on version) like: ACTION STRIKES, EVOLVE, DAMAGE, Symphony Series, The Grandeur, Abbey Road Drummer, and much more.
This is a bundle that is REQUIRED for anyone who wants to make music of any kind, or audio for video.


More Awesome Stuff
Hide Your REAL NAME in FL Studio
How To Removed Copyright Music and Keep the Dialogue
How To Use Retrospective Recording in Studio One 6