DAVINCI RESOLVE
CHROMA KEY


Chroma Key is the proper term when talking out “green screening” an image, or removing a green or blue screen background.
And in DaVinci Resolve, we have two ways to key out a green screen (or any color).
The Color page, and Fusion.
It’s also very easy to do in either page once you know how.
The video below will cover everything you need to know to become a master at Chroma Key in DaVinci Resolve.
All of this can be done in the free verison of DaVinci Resolve.
Color Page – Remove a background of any color
To remove a green screen (or any color) in the Color Page, first select the Qualifier and click the color you want to remove from the video.
You can also click & drag to select a range of colors.
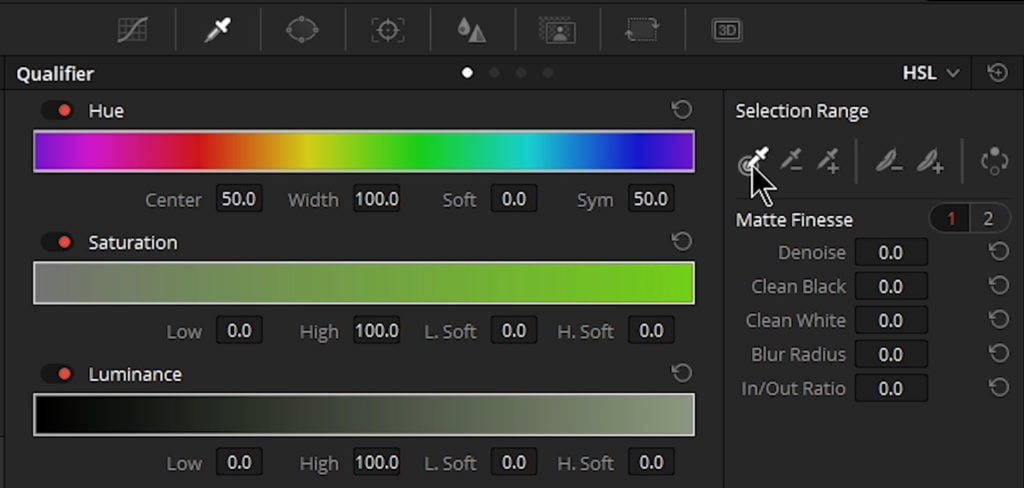

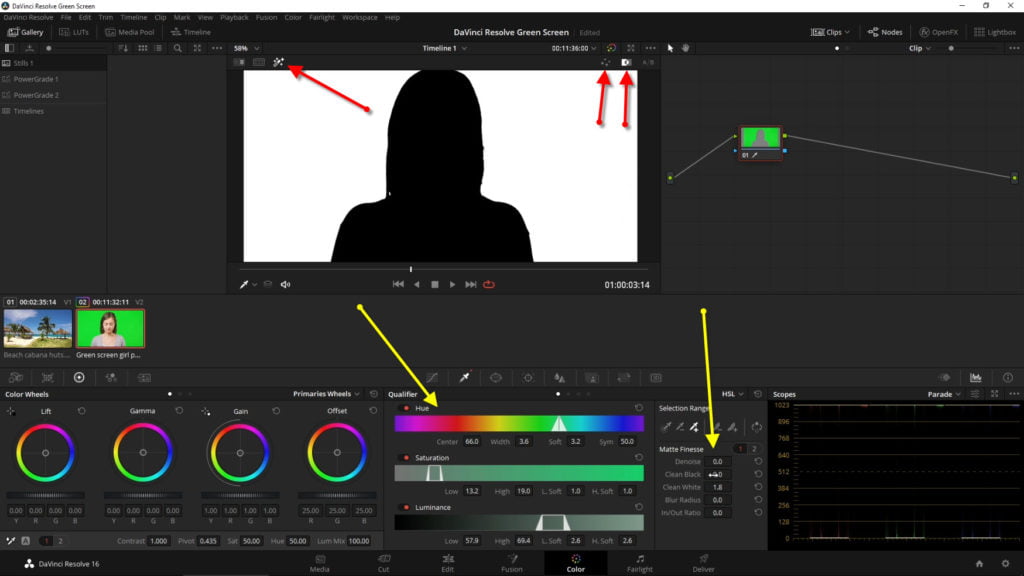
Then dial in your selection with the Matte Finesse controls, and Qualifier controls.
You can come back to these to refine your selection at any time.
If you’re not seeing your mask, make sure you active the Highlight overlay.
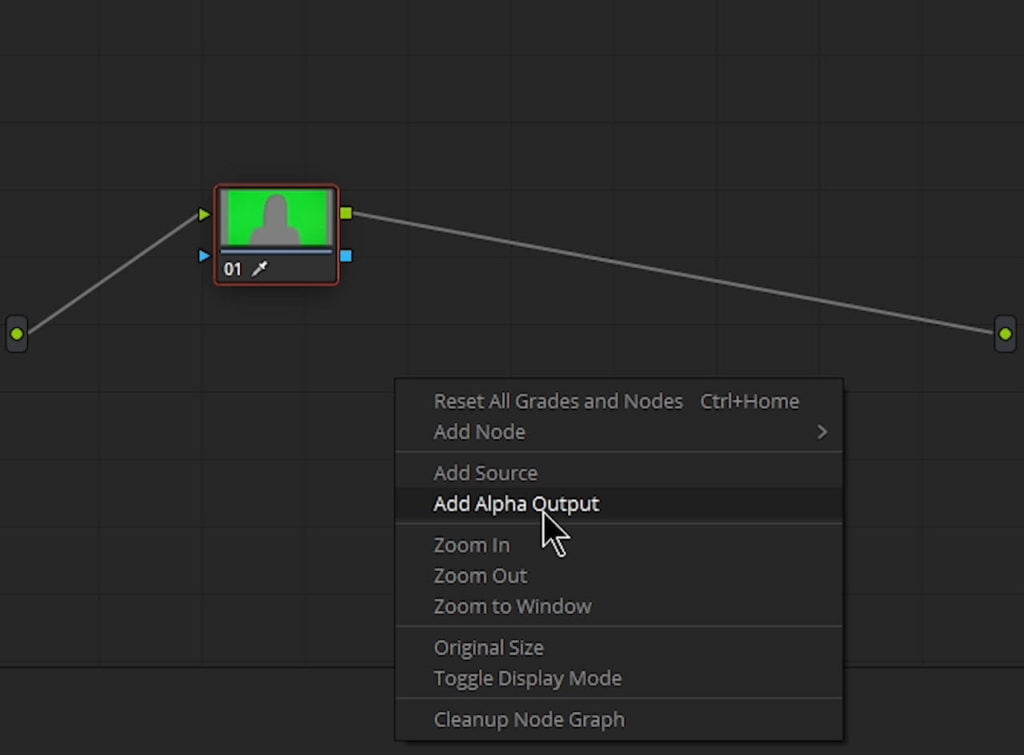
In order to see through your green screen selection, you need to create an Alpha Output in the Color page.
Right-click in the Node area and choose Add Alpha Output
Then, connect the mask output to the Alpha Output.
You will now see through the green screen.
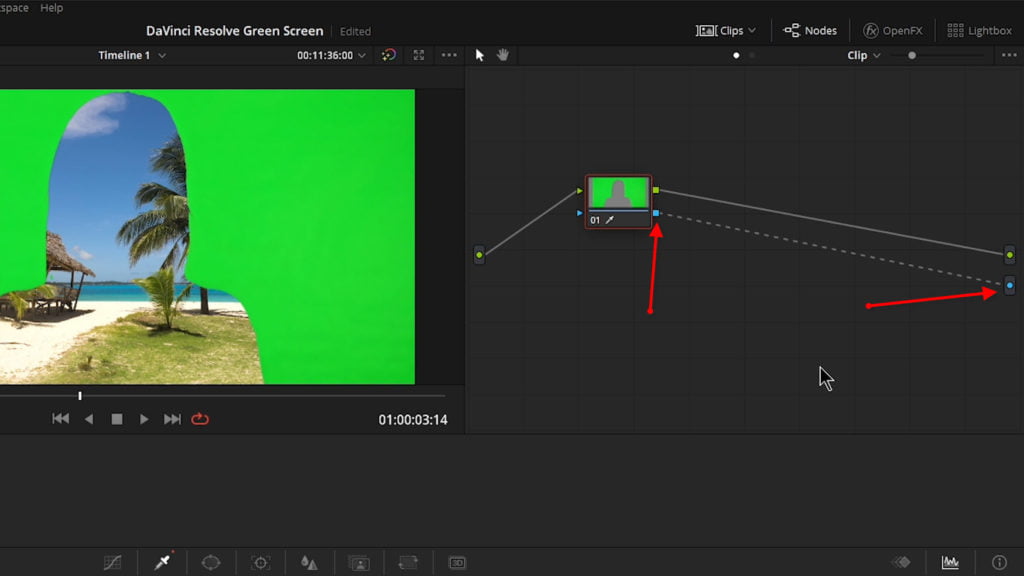
That’s NOT what we wanted! We want the green screen to disappear and to see our subject.
No problem!
All you need to do is Invert the matte.
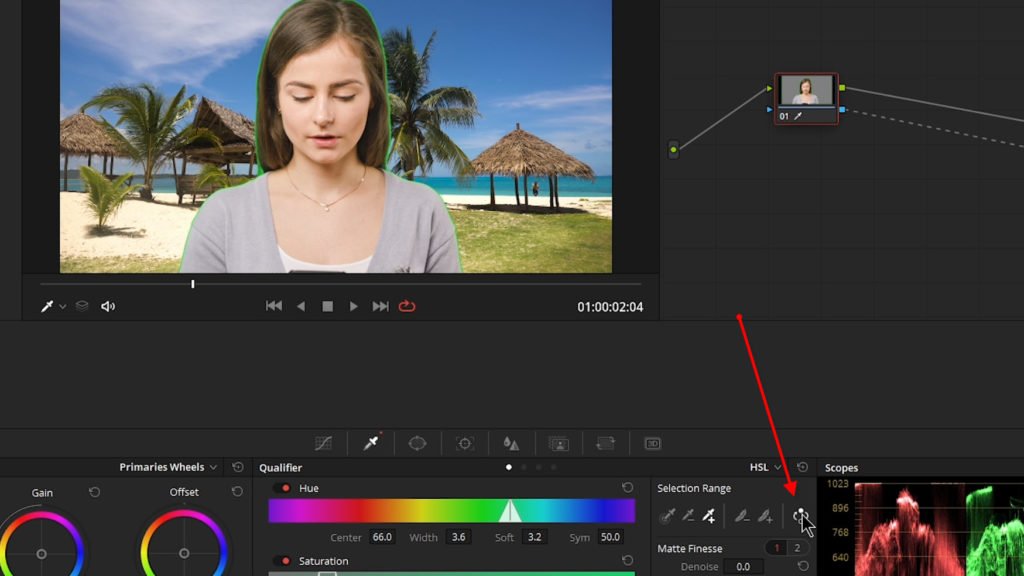
You can now continue to refine your matte with all of the tools already mentioned until you get it just right.
Use the ‘+‘ dropper in the Selection Range to add more color into your selection or adjust manually as before.
Once you are happy, head back to the Edit page and view your freshly keyed composition.
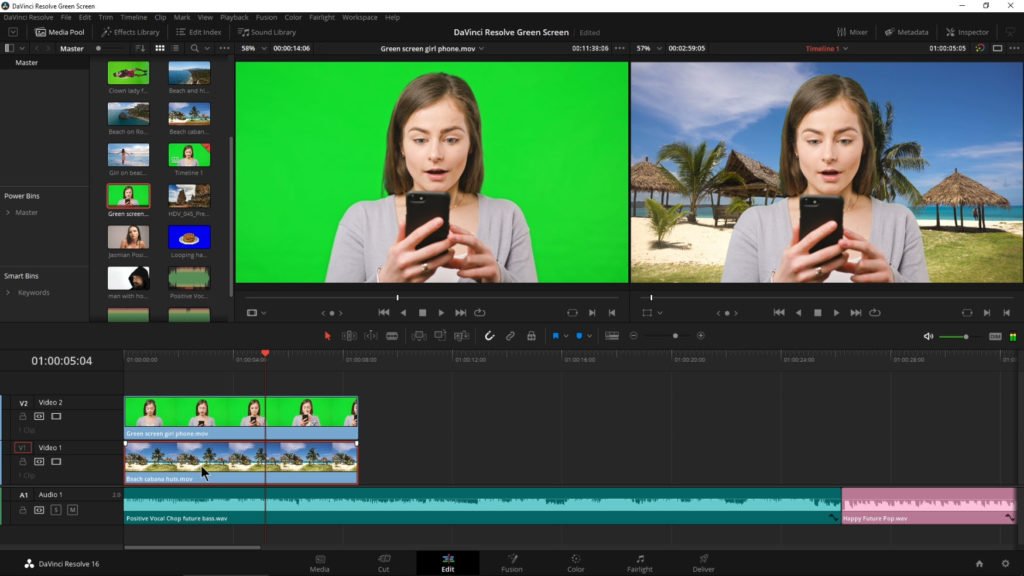
Chroma Key in Fusion
Chroma Key in Fusion is very fast, easy, and clean.
There are a few ways we could go about keying in Fusion. For this article I will go through one method. Watch the video to see more ways to key in Fusion and choose the method that works best for you.
We’re going to use the Delta Keyer to pull a key very quickly.
Setup your timeline with your background clip on V1 and your green screen clip on V2.
Select both clips, right-click, and create a new Fusion Clip.
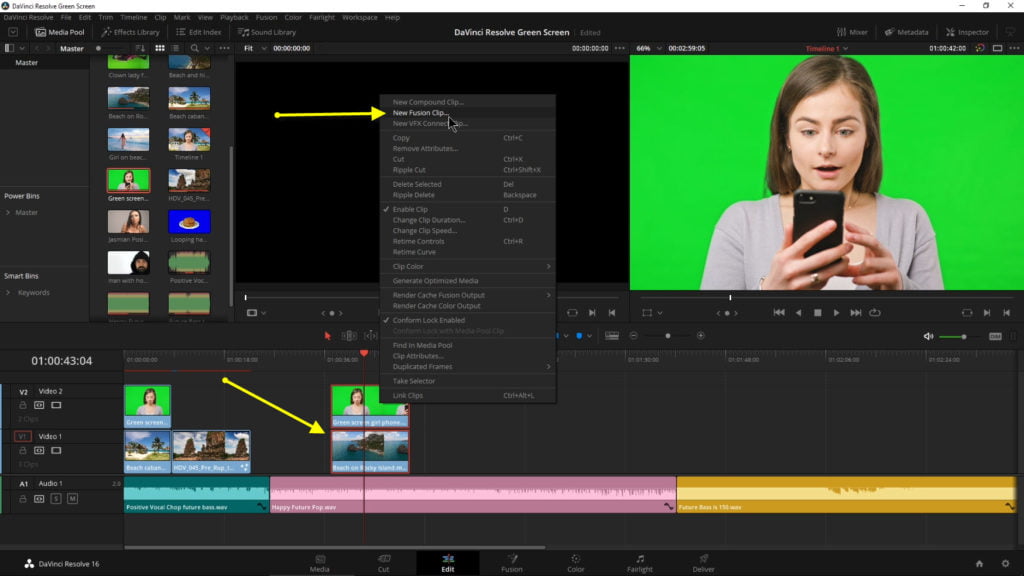
Understand, you don’t have to create a Fusion Clip to key in Fusion.
You can key out a clip without anything else behind it, or drag all your clips in directly in Fusion.
Both of those methods are shown in the video.
After you create your Fusion Clip, head into Fusion.
It should look like this, with MediaIn 1 being the background, and MediaIn 2 being the green screen clip.
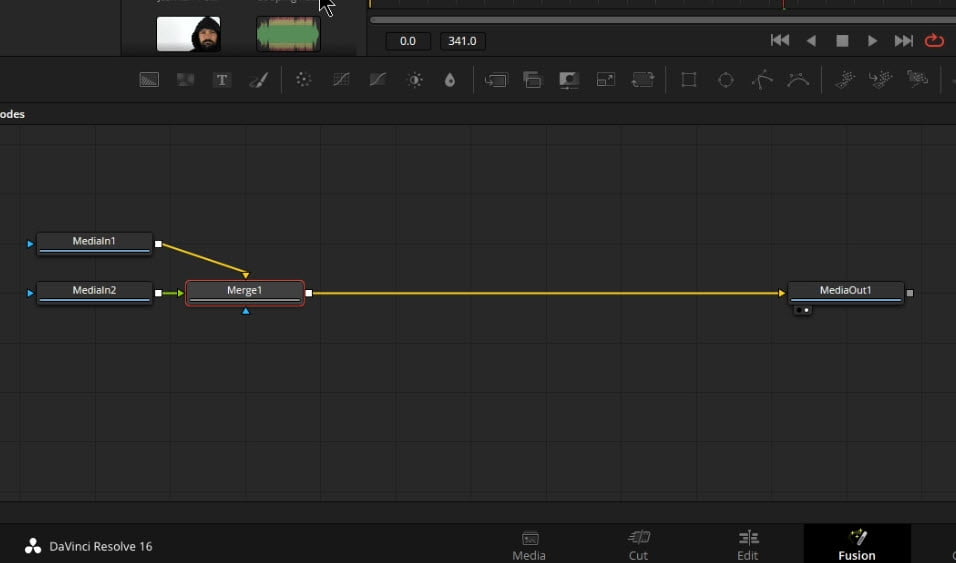
Now we need to add the Delta Keyer.
There are many ways to do this.
You could press Shift+Spacebar and type in ‘Delta’
Or go to
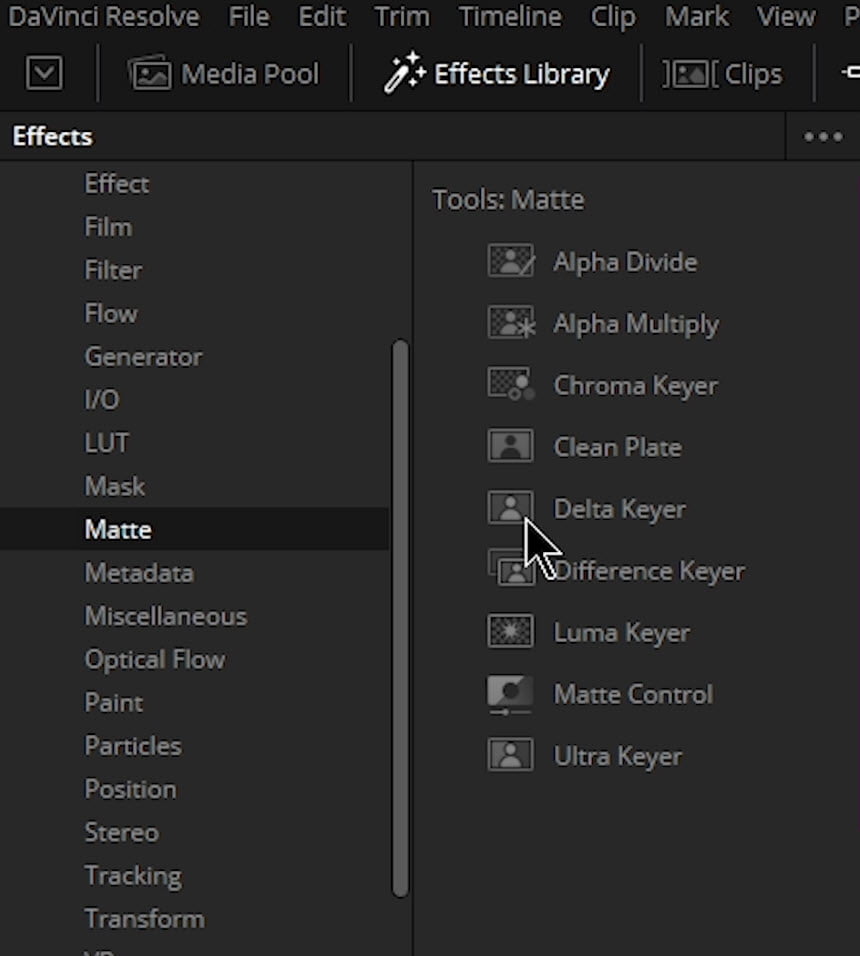
- Effects Library > Tools > Matte > Delta Keyer
If you select MediaIn 2 first, then you can simply click the Delta Keyer and it will automatically connect. Otherwise, just drag it in and connect MediaIn 2 to the Delta Keyer, and the Delta Keyer to the Merge node.
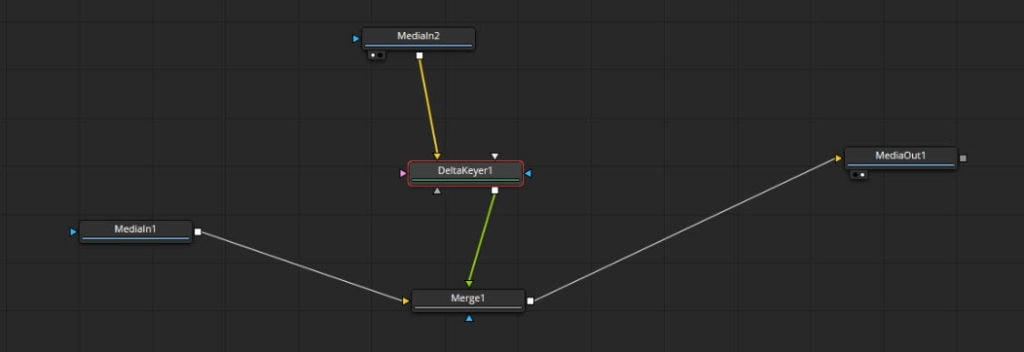
Here’s how you want everything connected:
MediaIn 1 to Merge Background input
MediaIn 2 to Delta Keyer Input 1
Delta Keyer to Merge Foreground input
Merge to MediaOut 1
Then, select the Delta Keyer node, open the Inspector, and on the first tab select the color picker.
Click and hold on the color picker and drag it over your video, once you’re over the color you want to key out, release the mouse button.
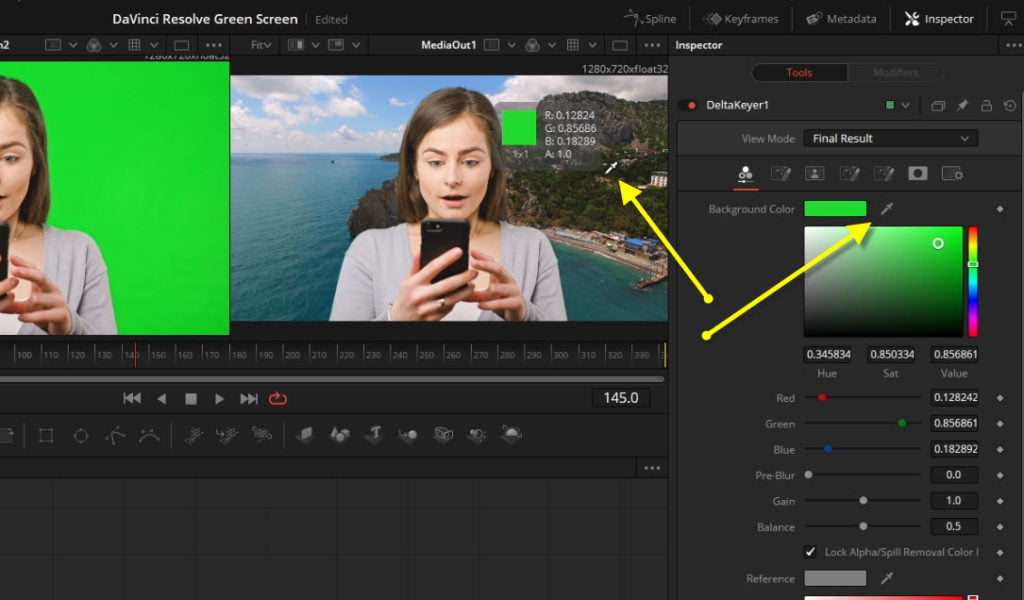
You should now have a pretty good key.
If you need to refine it, use the tools of the Delta Keyer to blur, soften, erode, etc…

This text tutorial assumes you have some basic knowledge of Fusion, and you know how to show your different clips in the viewer and get around in a basic way.
If you know nothing about Fusion, watch the video for more detail.
After you are happy with your key, head back to the Edit page and view your composition.
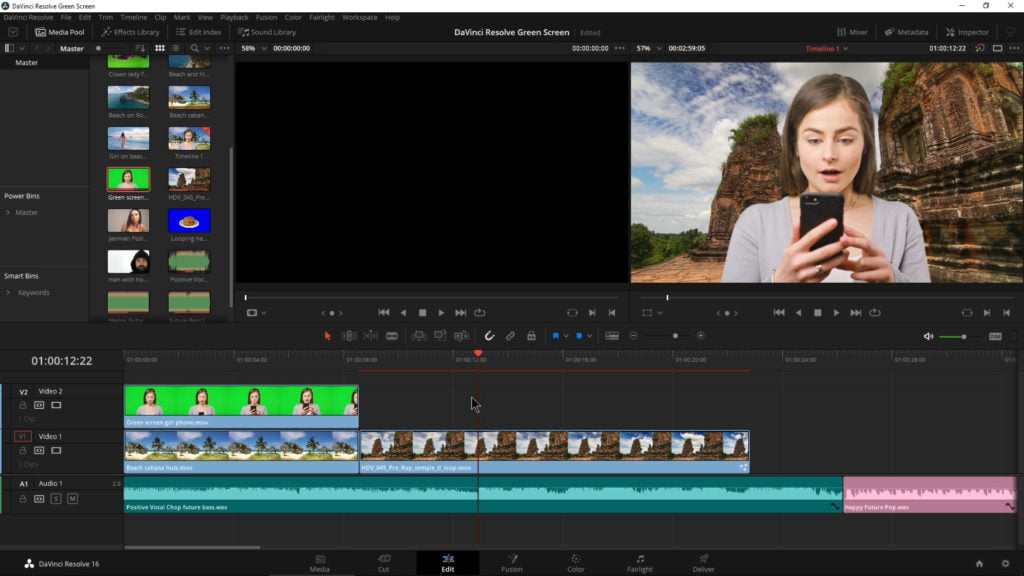
And that’s it!
If you need to refine your selection, you can always go back into Fusion and adjust any parameters.
The video below will show you more tips and trick for keying in DaVinci Resolve.
Chroma Key in DaVinci Resolve is quick and easy.
Use which ever method works best for each clip, either Color, or Fusion.
This video was created with DaVinci Resolve 16.1 (free version)


More Awesome Stuff
How To Removed Copyright Music and Keep the Dialogue
How To Use Retrospective Recording in Studio One 6
3 MUST-KNOW Ways to Move/Transpose MIDI in Studio One without Dragging