EVO 8 4in/4out
Smart Audio Interface

The EVO 8 from Audient, builds on it’s smaller brother, the Evo 4, by adding more inputs, and more outputs.
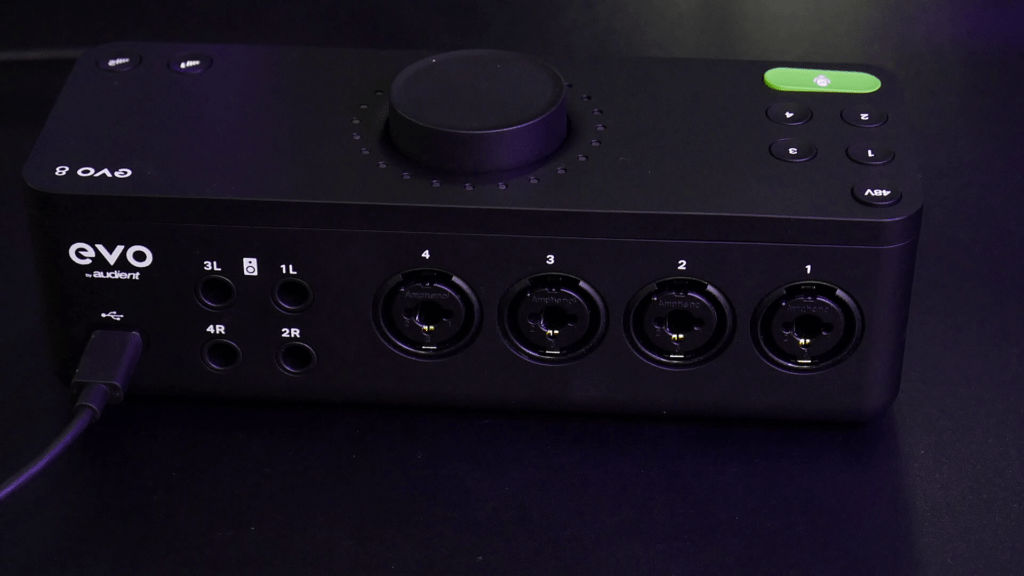
The Evo 8 boasts 4 combo inputs (XLR & 1/4″) and 4 1/4″ TRS outputs.
And the mic pre-amps are really good for a bus-powered device, clean and enough power to drive most microphones.
It’s a USB-C interface, but can be used with a USB-A to USB-C cable.
The unit will ship with a USB-C to USB-C cable that is about 39 inches long.
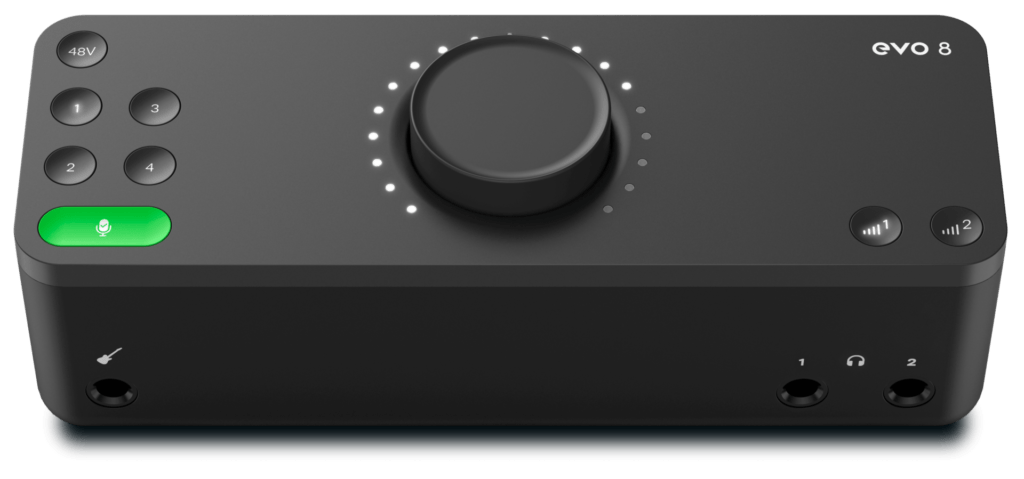
There’s also a 1/4″ DI Instrument input on the front for things like guitar or bass.
However, if you have high-output Active pickups, you could also use one of the inputs on the rear.
When you use the DI on the front, it will bypass Input 1 on the rear, so you can only use 4 total inputs at one time.
The front also has 2 independent headphone outputs.
When you plug in headphones, it will automatically bypass the speakers plugged into the rear.
Headphone 1, would bypass Output 1/2
Headphone 2, would bypass Output 3/4
This makes it quick to switch between your studio monitors and headphones.
To use headphones and studio monitors at the same time, you could plug your monitors into Outputs 1/2 and plug the headphones into Headphone output 2.
EVO 8 UNBOXING VIDEO
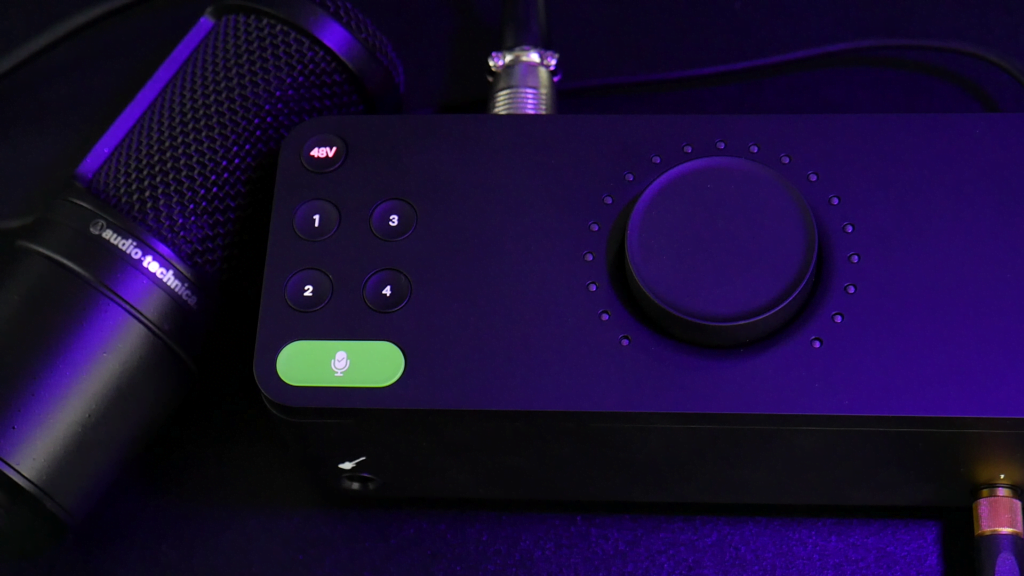
The Evo 8 includes 48v Phantom Power, and you can turn it ON per input.
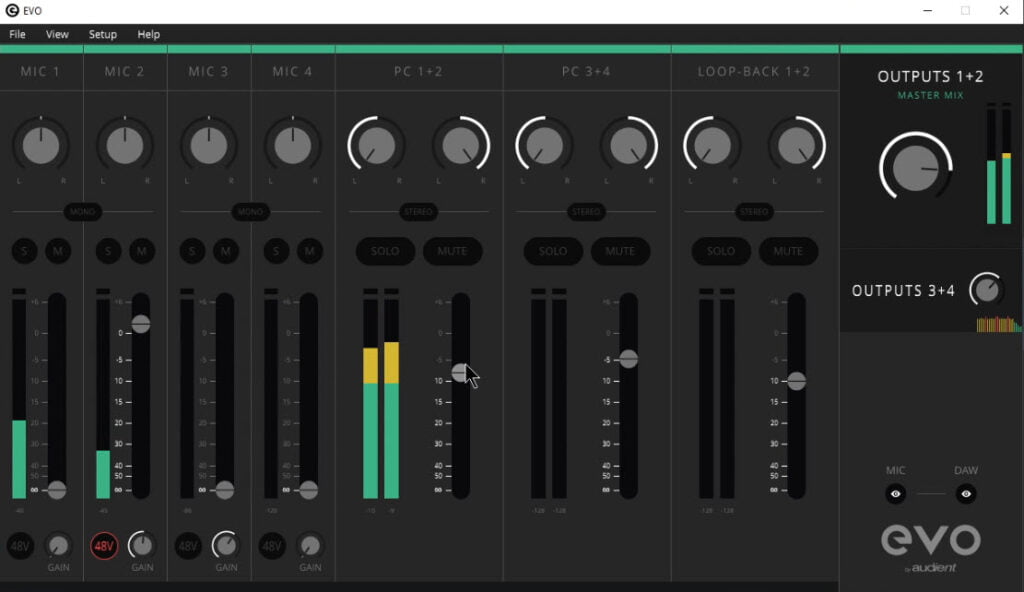
The Evo 8 also includes an on-screen mixer.
With it, you can adjust your monitor levels, adjust the input gain and turn Phantom Power On/Off.
Just like the Evo 4, the Evo 8 includes Smartgain.
This technology will analyze your input level and set it for you properly and automatically.
The Evo 8 also includes Loopback, which is an indispensable feature. Once you have an interface with Loopback, you will never buy one that doesn’t have it.
We’ll cover Loopback in a different article. But, it’s useful for livestreaming with your DAW, podcasting, recording ZOOM or Skype calls, and way more.
EVO 8 REVIEW VIDEO
SETUP THE EVO 8
Setting up the EVO 8 is easy.
To register the unit, go here.
You’ll need to download the drivers, even if you are on Mac.
You can get the drivers here.
We have created a video that will walk you through everything you need to know in order to get up and running with the Evo 8.
We’ll cover everything from how to register, install the driver, using the Evo 8 as the playback engine for your computer, and how to record in your DAW.
Watch it from beginning to end, and you’ll be an Evo 8 expert in under 10 minutes.
VIDEO
To learn about the Loopback feature, head over here.
The Evo 8 is a small footprint, affordable, high quality audio interface.
If you want to check it out further, head over to the Evo site.
Affiliate Disclosure: This site is an Amazon affiliate that earns money when people use our links. You get a great deal and we can keep providing content for free.


More Awesome Stuff
IK Multimedia iLoud Sub w/ARC X – Review
Bogren Digital AmpKnob UBER METAL – Album Ready Guitar Amp Plugins (Engl Savage & Diezel VH4)
IK MULTIMEDIA ARC ON•EAR – Headphone Correction and Virtual Mix Room