DAVINCI RESOLVE
TEXT REVEAL EFFECT
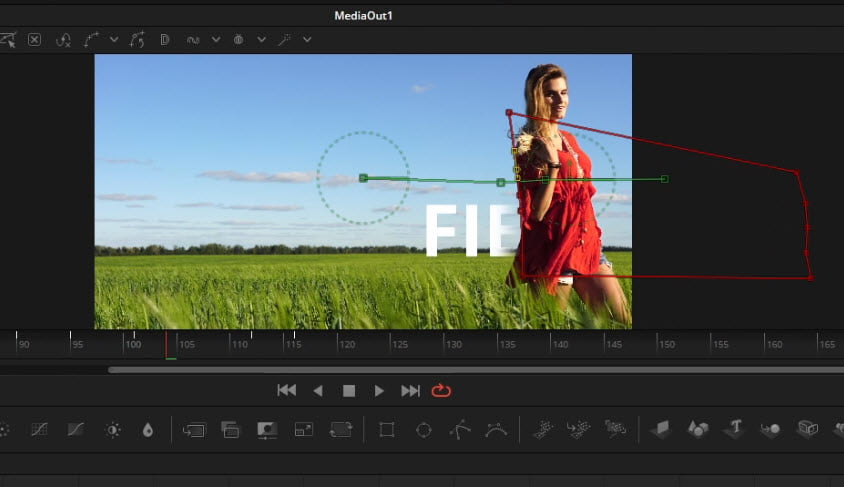
A text reveal is an effect where the text appears on-screen as if being revealed.
You’ll often see it combined with moving objects.
For example, you may see it with a car driving by, and the text is revealed as the car passes the screen. Or you may see a person walking across the screen as the text is revealed as they pass by.
It’s easy to do this in DaVinci Resolve.
All you really need to do is create a mask and animate it.
We’ll do this two ways: in the Color Page and in Fusion.
Watch the video below to see it in action!
COLOR PAGE METHOD
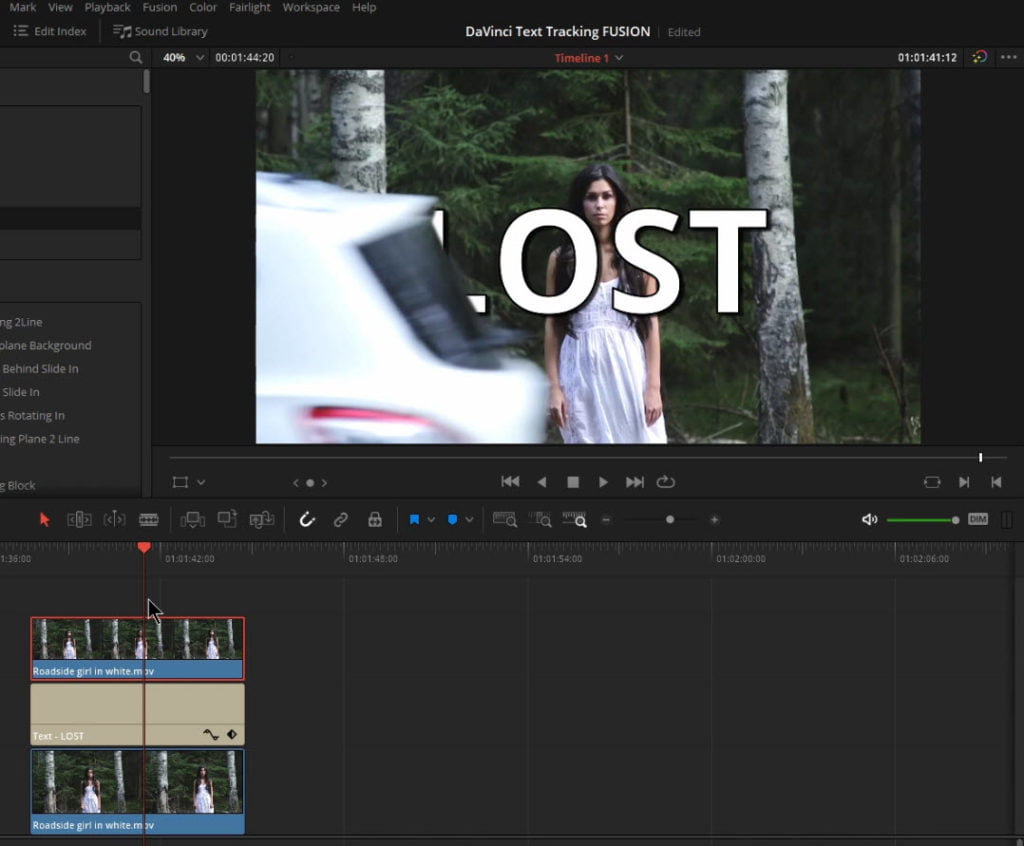
To do this in the Color page, first place your clip on the timeline in the Edit page and duplicate it. Place the duplicated track two tracks above the main clip.
Place the Text or Text+ tool between the clips.
Disable the top clip and create your text and any animation.
Re-enable the top clip.

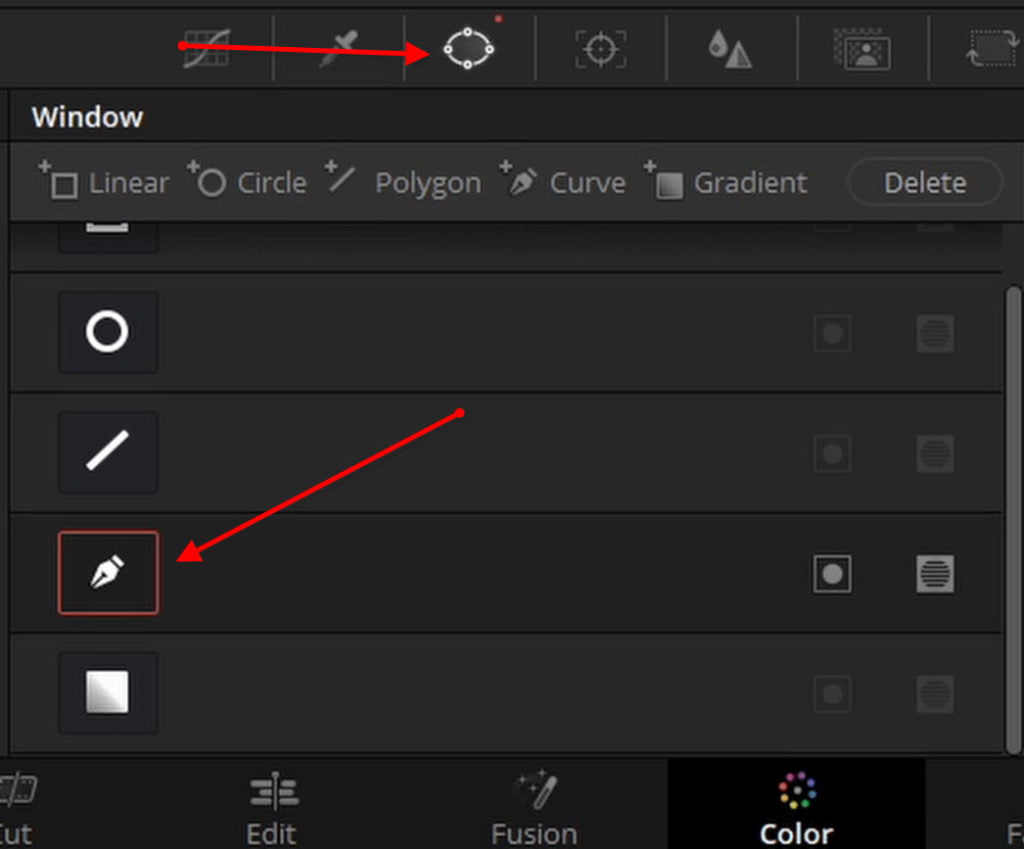
Go to COLOR
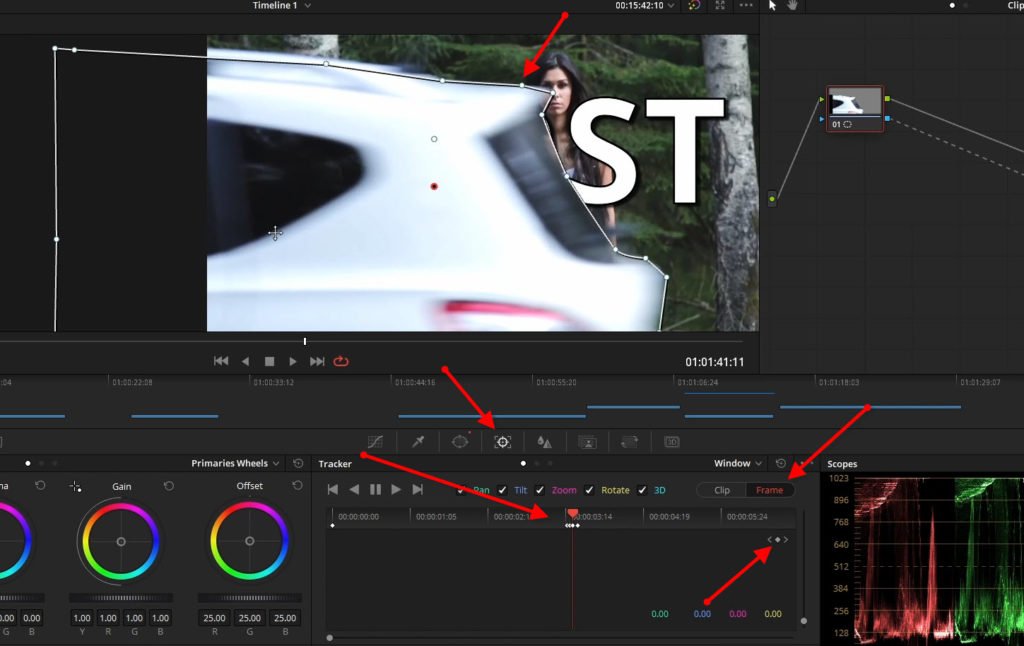
Select Power Window and choose the Pen tool.
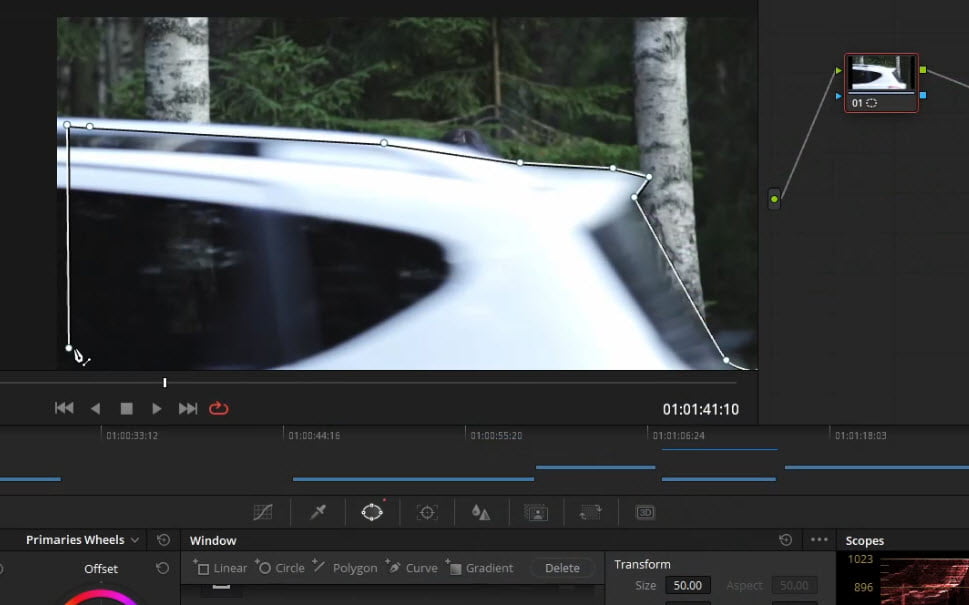
Draw a shape around the object you want to reveal the text.
You could also use the other tools like, Square or Circle if they work for your clip.
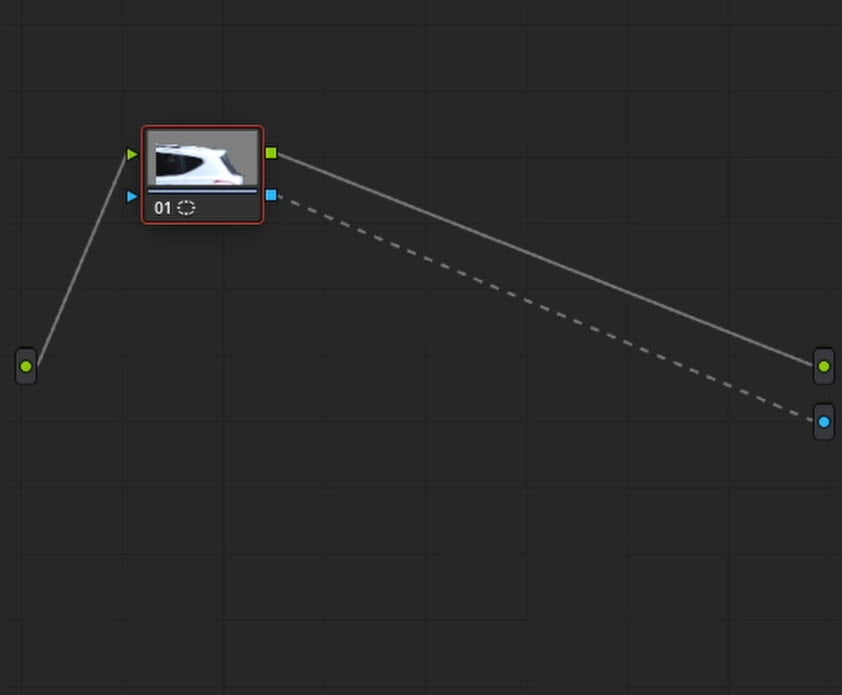
Right-click and ‘Add Alpha Output‘
Connect the blue square to the round blue output.
Now you need to animate the mask so it ‘sticks’ to the object, in this case the car.
You can do this with the Keyframe editor in the Color page, but it’s actually easier to use the Tracker.
Click the Tracker tab.
Select FRAME
Set your first keyframe by clicking the diamond in the Tracker.
Step through your clip and adjust the mask to move with the object.
You don’t necessarily have to keyframe every frame! But, you may have to. It just depends on the motion.
You could also track the mask automatically if it works for your clip.
But it won’t for our example.
And that’s it.
Add some softness to the mask if needed, and make any further adjustments.
Head back to the Edit page and playback your awesome text reveal.
FUSION METHOD
Now we’ll do the Text Reveal in Fusion.
Place your clip on the timeline in the Edit page.
Place the playhead over the clip and select it.
Go to FUSION.
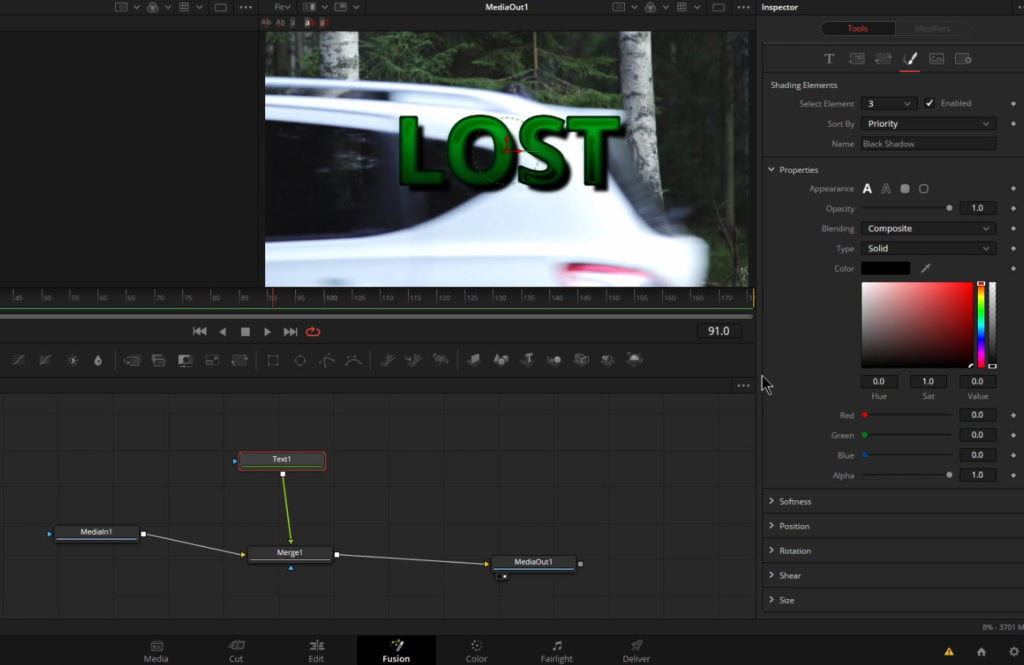
Add a Merge node between MediaIn1 and MediaOut1.
Add a Text node and connect it to the Merge1 node.
Go ahead and create your text and any animation. You can always change it later if you need to.
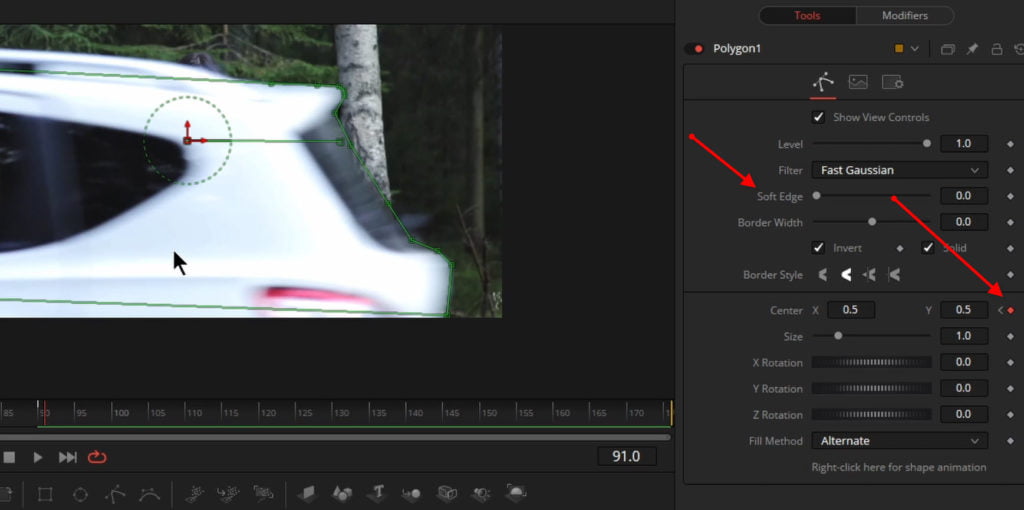
Add a mask to the Text node.
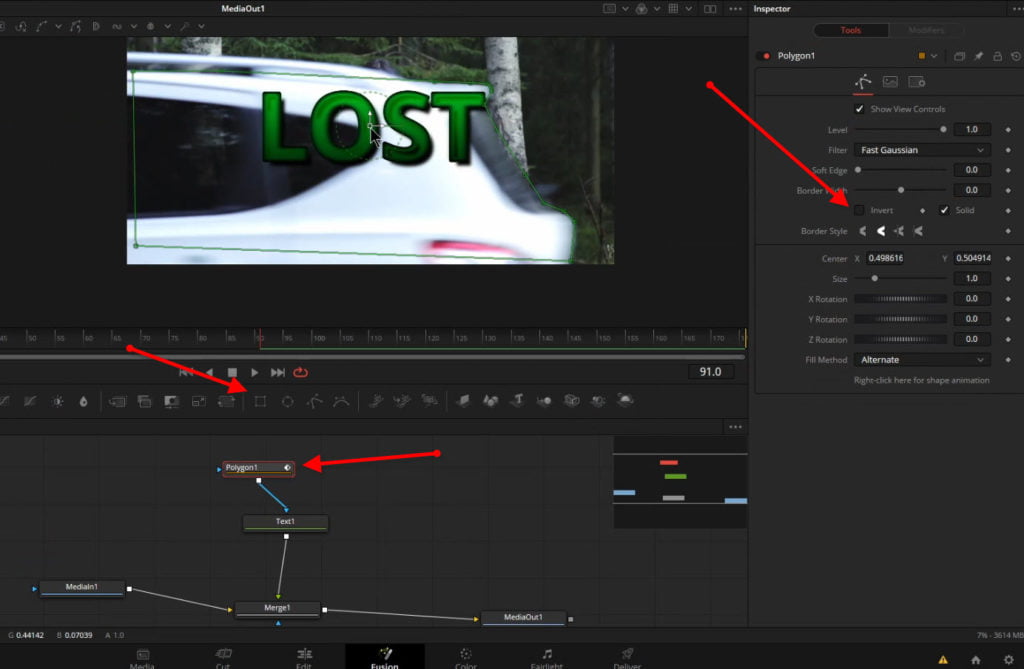
For this example we need a Polygon mask, but you could use a Rectangle, Circle, BSpline etc… if it works for your clip.
Select the Polygon node and draw a mask around your object.
You can invert the mask if you need to see what you are doing, or you can simply disconnect the Polygon from the Text node and draw your mask.
Then connect it after your mask is closed.
You will probably need to INVERT the mask to get the effect you want, but it depends on what you are trying to do.
Watch the video to see it in action.
Once your mask is setup, it’s time to animate it.
Make sure you have the Polygon node selected.
Click the keyframe for Center X & Y.
Step through the clip and move the mask as needed.
Once the animation is done, you can add softness to the mask or add a blur node to the mask.
And that’s it!
Go back to the Edit page and view your awesome Text Reveal.

You can do MUCH more in Fusion as well.
For this example, you could also mask out the woman so the text is behind her as it’s being revealed.
You could use 3D text too.
We’ll go over that, and more in the video below.
- 0:00 – Intro
- 0:25 – Color Page Text Reveal
- 7:35 – Fusion Text Reveal
- 16:57 – Put Text Behind Secondary Object
- 21:18 – Use 3D Text
- 24:27 – More Text Reveal Examples
This video was created with DaVinci Resolve 16.2.2 (free version)
Affiliate Disclosure: This site is an Amazon affiliate that earns money when people use our links. You get a great deal and we can keep providing content for free.



More Awesome Stuff
Hide Your REAL NAME in FL Studio
How To Removed Copyright Music and Keep the Dialogue
How To Use Retrospective Recording in Studio One 6